How To Wire Bathroom Light And Fan
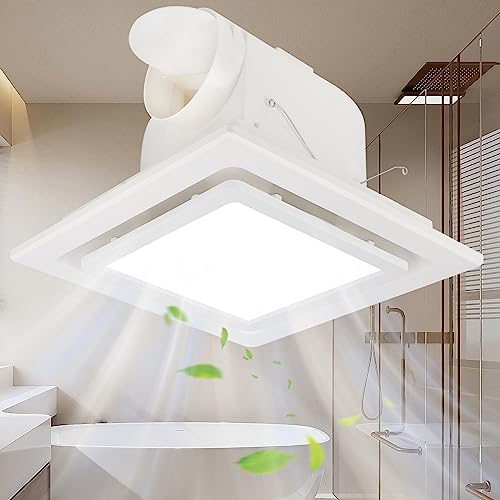
Are you looking to upgrade your bathroom lighting and ventilation? If so, this article will guide you through the process of wiring a bathroom light and fan, step by step. By following these instructions, you’ll be able to enhance both the functionality and aesthetics of your bathroom.
Before you begin, gather the necessary tools and materials to ensure a smooth installation. Safety should always be a top priority, so make sure to turn off the power to the bathroom before starting any work.
Once you’ve done that, you can begin installing the light fixture and fan.
Connecting the wiring is a crucial step in this process, so it’s essential to do it correctly. Afterward, you’ll want to test the wiring to ensure everything is working as it should.
Finally, secure the wiring and install the cover plates to complete the project.
With the power back on, you can now enjoy the benefits of your upgraded bathroom lighting and ventilation. Just remember to keep safety in mind throughout the installation process.
Key Takeaways
- Upgrade bathroom lighting and ventilation
- Gather necessary tools and materials
- Turn off power to bathroom before starting work
- Safety goggles and gloves recommended
Gather the Necessary Tools and Materials
Now that you’ve got all the tools and materials ready, it’s time to dive into the fun part of wiring your bathroom light and fan! Before you get started, make sure you have the following tools on hand:
- a screwdriver
- wire strippers
- wire nuts
- electrical tape
- a voltage tester
Safety is a top priority, so remember to turn off the power to the bathroom at the circuit breaker before you begin. It’s also a good idea to wear safety goggles and gloves to protect yourself from any potential hazards.
Additionally, ensure that the light and fan you purchased are compatible with the wiring in your bathroom. Following these safety precautions and having the necessary tools will help you complete the task smoothly and efficiently.
Turn Off the Power to the Bathroom
First, make sure you shut off the power to your bathroom to ensure a safe and worry-free installation process. Safety precautions are paramount when working with electrical wiring. Turning off the power will prevent any potential accidents or shocks.
Locate your home’s main electrical panel and identify the circuit breaker that corresponds to the bathroom. Flip the corresponding switch to the ‘off’ position. Use a voltage tester to double-check that the power is truly off before proceeding.
It’s important to understand that working with electrical wiring can be dangerous if you’re not experienced or knowledgeable. If you have any doubts or lack the necessary skills, it’s highly recommended to hire a professional electrician to handle the installation for you. They have the expertise and tools to ensure a safe and successful installation.
Install the Light Fixture
To install the light fixture, start by removing the existing light fixture using a screwdriver.
Next, connect the wires from the electrical box to the new light fixture, making sure to match the corresponding colors.
Finally, secure the light fixture to the ceiling using the provided screws or mounting bracket. Make sure the fixture is snug and flush against the ceiling to ensure proper installation.
Remove the Existing Light Fixture
Start by turning off the power to the bathroom light and fan before beginning the process of removing the existing light fixture. This is crucial to ensure your safety during the installation.
To properly remove the existing light fixture, you should first refer to a demo video or tutorial for guidance. This will provide you with a visual representation of the steps involved in the process. It’s important to avoid common mistakes such as not disconnecting the power source, which can result in electrical shock.
Once the power is turned off, use a screwdriver to remove the screws that hold the light fixture in place. Gently pull the fixture away from the wall or ceiling, being careful not to damage any wires.
With the fixture removed, you can proceed to the next step of installing your new light and fan.
Connect the Wires to the New Light Fixture
Next, you’ll connect the wires from the new fixture, ensuring a secure and reliable electrical connection. It is crucial to follow proper grounding techniques to ensure safety and prevent electrical hazards. Here is a step-by-step guide on connecting the wires:
| Wire Color | Function |
|---|---|
| Black | Hot wire (typically connects to the black wire from the fixture) |
| White | Neutral wire (usually connects to the white wire from the fixture) |
| Green or Bare Copper | Ground wire (should be connected to the green or bare copper wire from the fixture) |
To make the connections, strip about 1/2 inch of insulation from each wire end and use wire nuts to secure the connections. Make sure the wire nuts are tight and there is no exposed wire.
If you encounter any issues during the wiring process, such as flickering lights or a non-functional fan, it is important to troubleshoot common wiring issues. Check for loose connections, damaged wires, or faulty switches. Consult a licensed electrician if needed to ensure proper resolution of any wiring problems.
Secure the Light Fixture to the Ceiling
After connecting the wires, it’s essential to securely mount the light fixture to the ceiling using the provided screws and brackets. This step ensures that the fixture remains in place and functions properly.
Begin by holding the light fixture against the ceiling in the desired location. Make sure it’s positioned correctly, allowing for proper illumination and clearance from any nearby objects.
Once in position, mark the screw holes on the ceiling. Use a drill to create pilot holes at the marked spots.
Then, align the screw holes on the light fixture with the pilot holes and insert the screws through the brackets, tightening them with a screwdriver.
Ensure that the fixture is level and flush against the ceiling. This will provide a stable installation and allow for optimal lighting in your bathroom.
Install the Fan
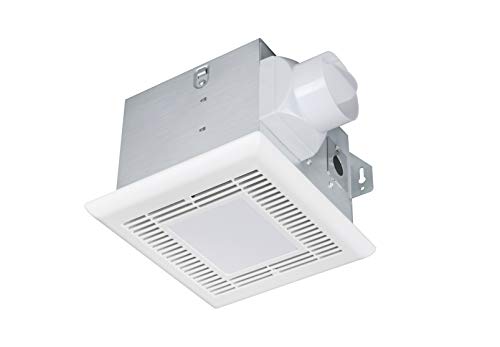
To begin installing the fan, you’ll want to make sure you have all the necessary tools and equipment handy.
First, locate the fan motor and position it in the desired location. Use the provided screws to secure the motor to the ceiling. Make sure the motor is level and securely attached.
Next, identify the power supply for the fan. Connect the fan’s wiring to the power supply using wire connectors. Ensure that the connections are tight and secure. Double-check that the fan is properly grounded for safety.
Once the fan is securely installed and connected to the power supply, test it to ensure it’s functioning properly. Turn on the switch and listen for the fan motor to start running.
If everything is in order, you can move on to the next step in wiring your bathroom light and fan.
Connect the Wiring
Now it’s time to get everything connected and make sure your new fan and light are working together like a charm. Before you begin, remember to turn off the power at the circuit breaker to ensure your safety.
Start by identifying the wire colors. Typically, black wires are for powering the fan and light, white wires are for neutral connections, and green or bare copper wires are for grounding. Connect the black wire from the fan to the black wire from the light using wire nuts, making sure to secure them tightly.
Next, connect the white wires together and secure them with a wire nut.
Finally, connect the green or bare copper wires to the grounding screw on the fan and light.
Once all connections are secure, turn on the power and test your new bathroom light and fan.
Test the Wiring
Before you flip the switch, make sure to turn on the power and see if your new wiring connections are working perfectly together. This step is crucial to ensure the successful installation of your bathroom light and fan. To help you test the wiring, here are some testing methods and troubleshooting tips:
- Use a voltage tester to check if there’s power running through the wires.
- Verify that the light and fan switches are properly connected and functioning.
- Test the light and fan separately to identify any issues with the wiring.
- Check for loose connections or damaged wires that may cause faulty operation.
- If the wiring isn’t working correctly, double-check your connections and consult a professional if needed.
By following these testing methods and troubleshooting tips, you can ensure that your bathroom light and fan wiring is properly installed and functioning safely.
Secure the Wiring and Install the Cover Plates
Make sure to securely fasten the wiring in place and attach the cover plates for a polished and finished look to your installation. Properly securing the wiring is crucial to ensure safety and prevent any potential hazards. Use cable staples or clips to secure the wiring along the joists or studs, keeping it neat and organized. Make sure to leave enough slack in the wiring to allow for future adjustments or repairs. Once the wiring is secured, it’s time to install the cover plates. Cover plates not only provide a clean and professional appearance but also protect the electrical connections from dust and moisture. Choose cover plates that match the style and design of your bathroom and carefully attach them using the provided screws. Double-check that the wiring is not pinched or damaged before completing the installation.
Table:
| Step | Description |
|---|---|
| 1 | Secure wiring using cable staples or clips |
| 2 | Leave enough slack in the wiring for adjustments |
| 3 | Choose cover plates that match the bathroom’s style |
| 4 | Attach cover plates using provided screws |
| 5 | Double-check wiring for any damage or pinching |
Turn On the Power and Enjoy Your Upgraded Bathroom Lighting and Ventilation
Experience the joy and comfort of your newly upgraded bathroom as you power on the lights and ventilation, transforming your space into a haven of relaxation and tranquility.
To fully enjoy the benefits of bathroom ventilation, consider incorporating wireless bathroom speakers into your setup. These speakers allow you to enjoy your favorite music or podcasts while getting ready for the day or unwinding in the evening. Not only do they enhance the ambiance of your bathroom, but they also provide a seamless audio experience.
Additionally, the benefits of bathroom ventilation cannot be overstated. Proper ventilation helps to eliminate excess moisture, preventing mold and mildew growth and ensuring better air quality. It also helps to remove odors and circulate fresh air, creating a more pleasant and inviting environment.
Finally, turn on the power and revel in the upgraded lighting and ventilation that’ll transform your bathroom into a serene oasis.
Safety Tips and Final Thoughts
To ensure a safe and enjoyable bathroom upgrade, it’s essential to take note of these important tips and considerations.
First and foremost, always prioritize safety precautions when dealing with electrical wiring. Make sure to turn off the power at the circuit breaker before starting any work.
It’s crucial to follow the manufacturer’s instructions and local building codes when wiring your bathroom light and fan. Use the appropriate wiring materials and connectors to ensure a secure and reliable connection.
When working with electrical wires, make sure to strip and connect them properly to avoid any loose or exposed ends. Additionally, it’s vital to understand the importance of proper wiring to prevent electrical hazards and ensure the longevity of your bathroom fixtures.
By adhering to these safety precautions and following proper wiring techniques, you can enjoy a well-lit and properly ventilated bathroom for years to come.
Frequently Asked Questions
What are some common mistakes to avoid when wiring a bathroom light and fan?
To avoid common mistakes when wiring a bathroom light and fan, make sure to properly ground the electrical connections. This ensures safety and prevents electrical shocks.
Is it necessary to use a GFCI outlet for the bathroom light and fan?
Yes, it is necessary to use a GFCI outlet for the bathroom light and fan. A GFCI outlet provides protection against electrical shocks and can prevent serious injuries. It is a crucial safety measure in wet areas like bathrooms.
Can I install a dimmer switch for the bathroom light and fan?
Yes, you can install a dimmer switch for the bathroom light and fan. The pros of a dimmer switch include adjustable lighting levels and energy savings. However, the cons include potential noise and compatibility issues with certain fans.
How do I properly ground the wiring for the bathroom light and fan?
To properly ground the wiring for your bathroom light and fan, follow these proper grounding techniques. Ensuring proper grounding is essential for safety and preventing electrical hazards.
Are there any specific building codes or regulations I need to follow when wiring a bathroom light and fan?
When wiring a bathroom light and fan, it is important to follow building code regulations and electrical safety precautions. These codes and regulations ensure that the installation is done correctly and safely, reducing the risk of electrical hazards.
Conclusion
In conclusion, wiring your bathroom light and fan requires careful attention to detail and adherence to safety guidelines. By following the step-by-step instructions outlined in this article, you can successfully install and connect the necessary wiring for both fixtures.
Remember to always turn off the power before starting any electrical work and test the wiring to ensure everything is functioning properly. With your upgraded bathroom lighting and ventilation, you can now enjoy a more comfortable and well-lit space.


.jpg)


